


Basil Strawberry Mousse Cake
This post may contain affiliate links. Please read our disclosure policy.
Welcome to this new basil strawberry mousse cake recipe from our "Secrets Behind French Pastry" playlist.
This cake recipe is not the easiest we shared on How To Cuisine. However, with a little bit of practice and the right equipment, it will be achievable!
Composed of a fluffy genoise, basil mousse, homemade strawberry jam, and a shiny Ferrari red mirror glaze, this mousse cake is perfect to impress your friends and family.
We truly can't wait for you to try this tasty mousse cake at home!
Bon appétit!
Difficulty: ![]()
![]()
![]()
Prep time: 1 hr 30 mins / Cook time: 50 mins / Servings: 10 people
- - - - - - - - - - - - - - - - - - - - - - - - - - -
Strawberry Jam
18 oz (510g) - Strawberries
1 - Lemon (juiced)
4 oz (113g) - Sugar
2 tsp (7.5g) - Pectin
Basil Mousse
4 - Egg yolks
¼ cup (60g) - Xylitol
9 oz (255g) - Milk
2 tbsp (24g) - Water
1 tsp (4g) - Gelatin powder
1 oz (28g) - Basil
12½ oz (354g) - Heavy cream
Red Mirror Glaze
6⅓ fl oz (180ml) - Water (to rehydrate the gelatin)
1⅕ oz (36g) - Gelatin powder
5⅓ fl oz (150ml) - Heavy cream
10½ fl oz (300ml) - Water
15 oz (450g) - Sugar
2½ oz (75g) - Corn syrup
5½ oz (155g) - White chocolate
To taste - Food colorings (red & gold)
Genoise
2 - Eggs
2¼ oz (65g) - Sugar
2 oz (60g) - Flour
- - - - - - - - - - - - - - - - - - - - - - - - - - -
We advise that you prepare all the above ingredients before starting.
You will typically need: a scale, measuring cups, mixing bowls.
Strawberry Jam
1 - Hull the strawberries with a sharp knife and dice them into small pieces on a cutting board.
Tip: We recommend you use a paring knife for this task. Sabatier knives are excellent french blades we recommend for professional and home cooks. We also love this reversible cutting board with integrated handgrips from John Boos.
2 - Transfer the strawberries to a saucepan (or like us a saucier pan).
Tip: All-Clad is the gold standard for professional quality stainless steel cookware. If you want to learn more about All-Clad, check out our detailed article "The Ultimate Buyer's Guide To All-Clad".
3 - Juice one lemon using a manual juicer (or a lemon squeezer) and pour it over the diced strawberries.
4 - Add the sugar and the pectin. Then, give it a quick stir using a spatula (wooden/silicone) to combine.
5 - Cook on low heat for about 25 minutes. Stir from time to time to prevent the jam from sticking to the bottom of the pan.
Tip: It should cook on a soft boil to activate the pectin.
6 - Once the jam has thickened, transfer it to a large glass container and place it in the refrigerator to chill for 30 minutes to 1 hour.
Tip: We store our ingredients in these mixing bowls and mini glass bowls from Duralex while cooking. We love Duralex for their quality products and low prices!
7 - Once cooled, place the jam into the silicone mold you are planning to use for the mousse cake, and freeze it for at least 3 hours.
Tip: If you want to learn more about silicone molds, check out our detailed article "What Is Food Grade Silicone And How To Use It: All You Need To Know".
8 - When completely frozen, unmold the strawberry jam, place it on parchment paper, and put it back in the freezer.
Basil Mousse
1 - Separate the egg whites from the egg yolks and place the egg yolks into a mixing bowl. Keep the egg whites in the refrigerator for another recipe.
2 - Add the xylitol to the egg yolks and whisk until well combined. Then, set aside.
3 - In a small bowl, combine the water and the gelatin powder. Then, mix with a fork until the gelatin is fully rehydrated and set aside to allow the gelatin to bloom.
4 - Pour the milk into a saucepan (or a saucier pan) and bring it to a boil.
5 - Slowly pour the hot milk over the egg yolks and give it a mix using the whisk.
6 - Transfer the mix back to the saucepan and slowly cook it over medium low heat until it reaches 167°F (75°C). Then, sieve the cream using a strainer and transfer it to a large mixing bowl with the help of a spatula.
7 - Microwave the gelatin for 10 seconds. Once melted, pour it into the cream and give it a quick stir using a spatula.
8 - Cover the cream with plastic wrap and let it cool in the refrigerator for at least 2 hours.
Tip: While the cream is cooling down, start the mirror glaze.
Mirror Glaze
1 - Combine the water and the gelatin powder in a ramekin. Then, mix with a fork until the gelatin is well incorporated into the water. Set it aside for later.
2 - Combine the remaining water, xylitol, heavy cream and corn syrup into a saucepan. Briefly mix with a spatula and bring the preparation to a boil.
3 - Add the white chocolate chunks into a mixing bowl and pour the boiled glaze over them. Emulsify the mixture with a hand blender.
Tip: Our must-have hand blender is the Braun Multiquick Technology.
4 - Add the gelatin and blend some more.
5 - After the gelatin is fully incorporated into the glaze, color it with the food coloring of your choice and blend it again.
6 - Cover the mixing bowl with plastic wrap and place it in the fridge overnight.
Genoise
1 - Preheat your oven at 330°F (165°C).
2 - Sieve the flour using a flour sifter.
3 - In a stand mixer bowl, crack 2 whole eggs and whisk for 2 to 4 minutes (using the whisk attachment) before adding the sugar.
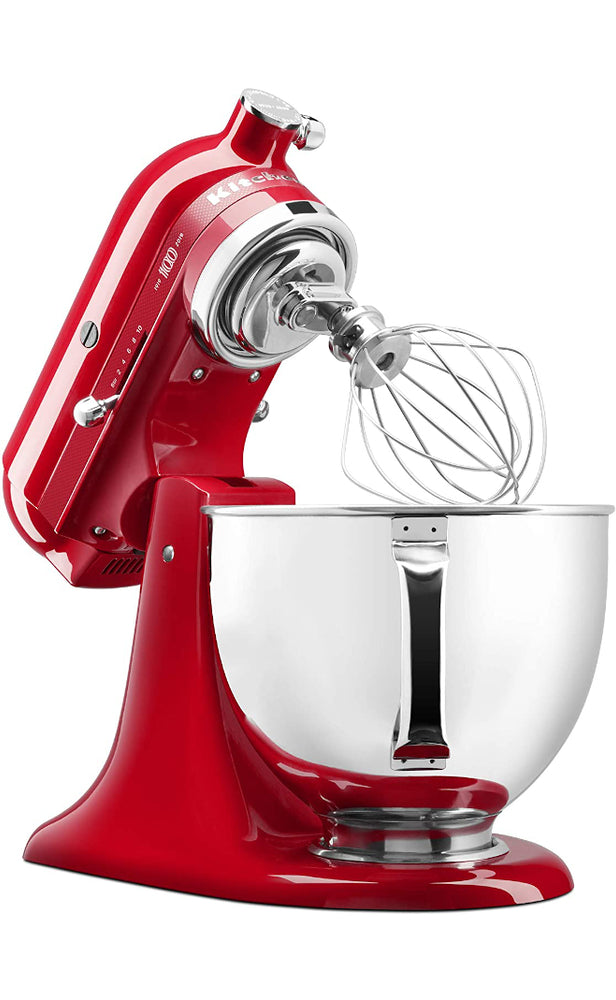
Tip: The KitchenAid Artisan Design Series and the KitchenAid Professional 600 Series are superstars among stand mixers and will look amazing in your kitchen! For more information, check out our detailed article "The Best KitchenAid Mixers & Blenders".
4 - Once the eggs start to become light and fluffy, slowly pour the sugar while mixing. Then, whip at medium speed for an additional 5 minutes (or until you obtain this consistency).
5 - Add the flour one half at a time in the whipped eggs and mix slowly using a spatula (or a hand mixer).
6 - Pour the genoise in a round cake pan lined with greased parchment paper.
7 - Bake at 350°F (175°C) for about 20 minutes. When ready, let the genoise cool at room temperature for about 10 minutes, dislodge it from the pan and gently remove the parchment paper.
8 - Cut the genoise according to your cake mold size using a knife or a cookie cutter.
Assembling The Mousse Cake
1 - Melt the base of the basil mousse in the microwave until it reaches 84°F (29°C) and transfer it to a glass measuring cup.
Tip: Pyrex is the gold standard of measuring cups, we love their quality and durability!
2 - Add the basil to the cream and blend them together using a hand blender.
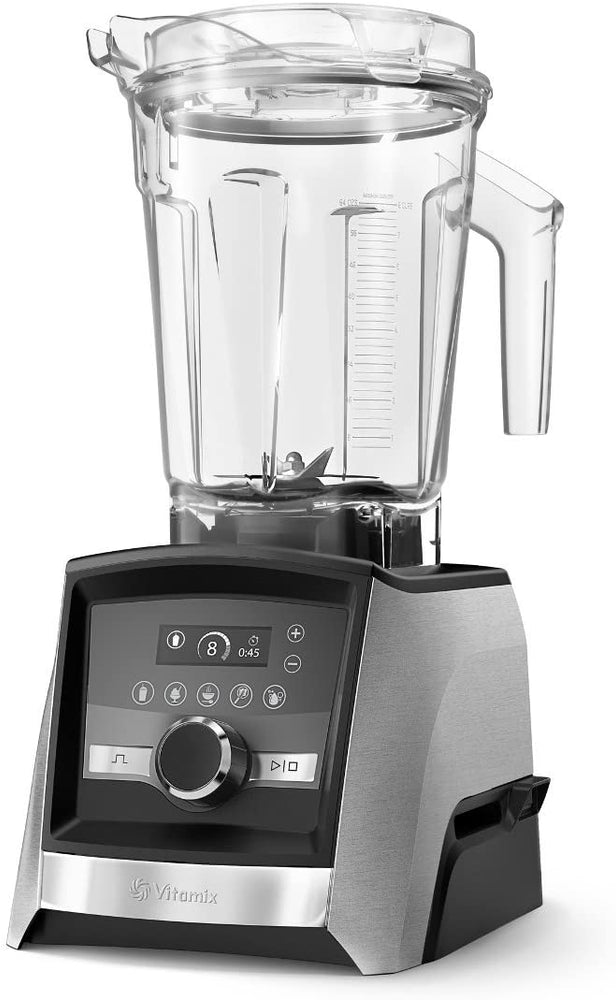
Tip: You may also use a blender for this task. Vitamix blenders are by far the best we have ever owned: Vitamix Explorian, Vitamix Professional Series 750, and the new generation Vitamix A3500.
If you want to learn more about Vitamix, check out our detailed article "The Ultimate Buyer's Guide To Vitamix".
3 - Filter the basil leaves by passing the cream through a strainer and transfer it to a bowl. Then, set it aside.
4 - Pour the heavy cream into a stand mixer bowl and whip it. The whipped cream must stay soft like so.
5 - Gently add the whipped cream into the liquid basil cream in two batches, using a silicone spatula. Mix until well combined and transfer the basil mousse into a glass measuring cup.
6 - Fill ¼ of the silicone mold with the basil mousse.
7 - Gently place the frozen strawberry jam on top of the mousse. Then, pour more basil mousse in the mold until it is half full.
8 - Add some fresh diced strawberries and fill the mold some more with the basil mousse until it is ¾ full.
9 - Place the genoise upside down in the mold and gently press it into the mousse.
10 - Finally, place the mold into the freezer, preferably overnight or at least for 6 hours.
The next day...
11 - Gently unmold the mousse cake and place it on a cooling rack. Then, place it back into the freezer.
Tip: Placing the cake back in the freezer helps ensure it remains as cold as possible prior to the glazing step.
12 - Place the mirror glaze in a measuring cup. Then, melt it in the microwave in 30 second intervals, until it reaches 98°F (37°C).
Tip: Making sure the glaze is at the right temperature is important. If too hot, it will melt your mousse and you will end up with irregular pastries. If too cold, the glaze will set too quickly on the mousse and will be too thick.
13 - Cover your work surface with plastic wrap to protect it from the glaze. You can also glaze over a baking tray.
14 - Raise the cooling rack over the plastic wrap. To do that, we like to use these small cake rings.
15 - Pour the glaze over the cake.
Tip: When glazing a cake, make sure to be self-assured and to do it in 1 time. If you pour the glaze too slowly, you will have unglazed areas and will be tempted to pour more glaze over. If you do so, the glaze will leave imperfections on your cake and will be thicker in these specific areas.
16 - Gently place the cake on a plate using a large icing spatula.
17 - Decorate your cake by placing some fresh strawberry slices on top of the glaze along with fresh baby basil leaves.
Tip: Here, we are using tweezer tongs for the pro touch.
18 - Place the mousse cake in the refrigerator for at least 2 hours to allow it to cool down to the right temperature.
19 - Enjoy!
Watch our video for more details!
- - - - - - - - - - - - - - - - - - - - - - - - - - -
Disclaimer: baking/cooking times vary according to each appliance. Make sure to always control halfway through for success.
- - - - - - - - - - - - - - - - - - - - - - - - - - -
🎬 Everything we used for this recipe:
🍶 Kitchenware: Coming soon!
🍳 Ingredients: Coming soon!
- - - - - - - - - - - - - - - - - - - - - - - - - - -
Enjoy our content? Support us! 💖
The information provided in this recipe is not nutritional or medical advice. Please read our disclaimer.