


Chocolate Christmas Yule Log
This post may contain affiliate links. Please read our disclosure policy.
Christmas is almost here!
In this recipe, learn how to make this gourmet chocolate yule log!
When it comes to yule log cakes, chocolate is one of our favorite flavors and one of the most common. This is why for our first Christmas together, we are pleased to share this delicious french style chocolate yule log!
Made with a sumptuous dark chocolate mousse, delicious milk chocolate whipped ganache, a praline crunchy base, a soft almond dacquoise, a shiny chocolate mirror glaze, and finally some beautiful handmade chocolate plumes.
This chocolate yule cake may look complicated, but in reality, this Christmas dessert is mainly made of simple components. The only thing that requires more technique is the chocolate plumes. But don’t worry, you will be able to make these beautiful chocolate decorations with a little practice.
We truly can’t wait for you and your family to try this outstanding Christmas yule log recipe!
Bon appétit!
Difficulty: ![]()
![]()
![]()
Prep time: 1 hr 20 mins / Cook time: 15 mins / Servings: 10 people
- - - - - - - - - - - - - - - - - - - - - - - - - - -
Whipped Chocolate Ganache
4.2 oz (120g) - Milk chocolate
2.8 oz (80g) - Heavy cream (boiled)
7 oz (200g) - Heavy cream (cold)
Almond Dacquoise Biscuit
3 oz (85g) - Almond flour
0.5 oz (15g) - Flour
1.4 oz (40g) - Powdered monk fruit sweetener
1.9 oz (55g) - Xylitol
3 - Egg whites (room temperature)
Praline Crunchy Base
1.4 oz (40g) - Milk chocolate
3.5 oz (100g) - Hazelnut butter
1.7 oz (50g) - Feuilletine
Dark chocolate mousse
3.8 oz (110g) - Dark chocolate
1 - Egg yolk
0.3 oz (10g) - Xylitol
1.7 oz (50g) - Milk
5.3 oz (150g) - Heavy cream
7 oz (200g) - Heavy cream
Chocolate Mirror Glaze
4¼ oz (120g) - Water (for gelatin)
¾ oz (20g) - Gelatin powder
7 oz (200g) - Water
12 oz (340g) - Stevia
6¼ oz (180g) - Heavy cream
5¼ oz (150g) - Cocoa powder
Chocolate Plumes
5.3 oz (150g) - Dark chocolate
- - - - - - - - - - - - - - - - - - - - - - - - - - -
We advise that you prepare all the above ingredients before starting.
You will typically need: a scale, measuring cups, mixing bowls.
Whipped Milk Chocolate Ganache
1 - Place the milk chocolate in a large mixing bowl and melt it in the microwave for 1 minute, in 30-second intervals. This will prevent the chocolate from burning. Then, use a silicone spatula to stir and melt any chunks that are left.
Tip: We store our ingredients in these mixing bowls and mini glass bowls from Duralex while cooking. We love Duralex for their quality products and low prices!
2 - Add the 2.8 oz (80g) of heavy cream to a small saucepan (or like us a saucier pan). Place over a medium to high heat and bring to a boil.
Tip: All-Clad is the gold standard for professional quality stainless steel cookware. If you want to learn more about All-Clad, check out our detailed article "The Ultimate Buyer's Guide To All-Clad".
3 - Once boiled, remove from the heat and pour over the melted chocolate. Use a silicone spatula to emulsify the cream and chocolate together.
4 - Finally, pour in the rest of the heavy cream and stir to combine everything together into a smooth ganache. Cover tightly, making sure the plastic wrap is in contact with the ganache, and refrigerate for 2 hours.
Tip: Help the planet by choosing biodegradable food wrap instead of plastic. 😊
5 - Transfer the chilled ganache into a stand mixer bowl and whip the ganache for 3 minutes using the whisk attachment. Once whipped, transfer to a piping bag.
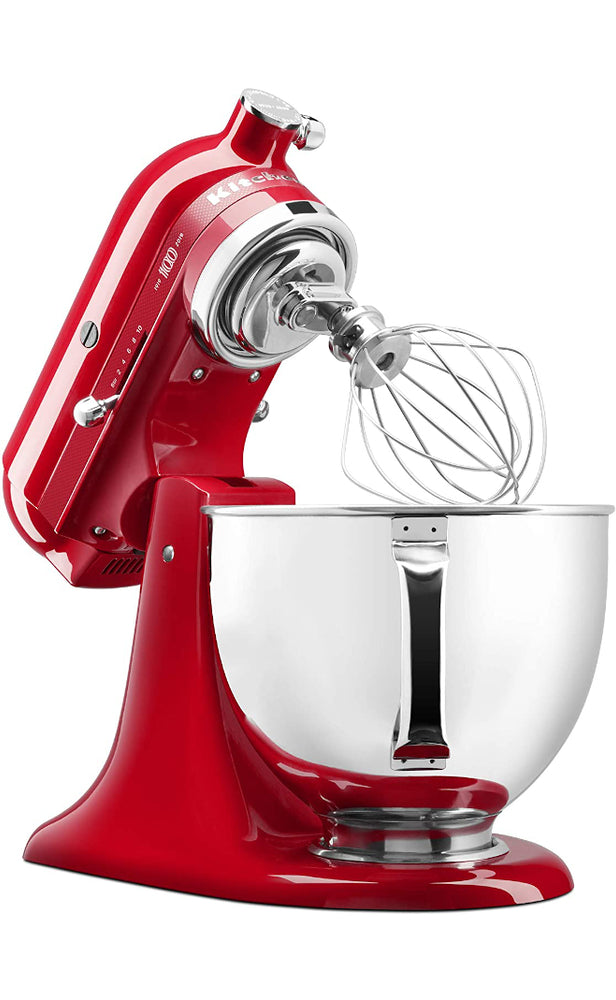
Tip: The KitchenAid Artisan Design Series and the KitchenAid Professional 600 Series are superstars among stand mixers and will look amazing in your kitchen! For more information, check out our detailed article “The Best KitchenAid Mixers & Blenders”.
6 - Pipe the whipped ganache into your yule log mold, filling about ½ of the mold. Use an offset spatula to spread the ganache out evenly and transfer it to the freezer for 2 hours or until completely frozen.
7 - After 2 hours, unmold the ganache from the silicone mold, transfer it onto a sheet of parchment paper and then place it back in the freezer.
Almond Dacquoise Biscuit
1 - Preheat your oven at 365℉ (185℃).
2 - To a large bowl, add the almond flour, plain flour, and powdered monk fruit sweetener. Use a silicone whisk to combine the mix together. Set aside.
3 - Add 3 egg whites to a clean stand mixer bowl. Then beat the whites into soft peaks using the whisk attachment. With the stand mixer still on, gently add the xylitol to the egg whites in 3 batches. Once all the xylitol has been added, whip the whites for a further 3 minutes to form stiff peaks.
4 - Add the mix of dry ingredients to the egg whites. Then, using the beater attachment, and at a slow speed, gently mix in the dry ingredients for 45 seconds.
5 - Coat the rectangular cake ring with baking spray and place it on a baking tray lined with a silicone mat.
6 - Pour the dacquoise biscuit mix into the cake ring, spreading it out evenly. Then, bake it at 365℉ (185℃) for about 15 minutes.
Praline Crunchy Base
1 - Melt the milk chocolate by heating it in the microwave for 1 minute, in 30-second intervals. Then, stir in the hazelnut butter and mix well to fully combine.
2 - Add in the feuilletine and stir to fully incorporate.
3 - Take the cooled dacquoise biscuit and slice it in half horizontally. Remove the top half and turn it upside down.
4 - Gently spread a layer of praline onto each slice of the dacquoise biscuit, making sure it is evenly spread into the corners. Then, transfer the biscuit to the freezer for 30 minutes.
Dark Chocolate Mousse
1 - Add the egg yolk and xylitol to a large mixing bowl, whisk until well combined and set aside.
2 - To a saucepan (or like us a saucier pan), add 5.3oz (150g) of the heavy cream and the milk. Place over medium to high heat to bring to a boil.
3 - Once boiled, remove from the heat and pour into the xylitol egg mix, whisking everything together. Then, transfer the whole mix back to the saucier pan. Over medium heat, allow the custard to cook until it reaches 185℉ (85℃).
Tip: We recommend using a good kitchen thermometer for accuracy.
4 - Once at the temperature, remove from the heat and pour over the dark chocolate. Use a silicone spatula to emulsify the chocolate into the custard and set aside.
5 - Using an electric hand whisk, whip the rest of the heavy cream into soft peaks. Then, carefully fold the whipped cream into the chocolate custard to form a silky smooth mousse.
Tip: Our must-have hand blender is the Braun Multiquick Technology.
Assembling the Yule Log
1 - Take the praline-coated dacquoise biscuits from the freezer and carefully cut them to the shape and size of the yule log mold.
Tip: Sabatier knives are excellent french blades we recommend for professional and home cooks. We also love this reversible cutting board with integrated hand grips from John Boos.
2 - Fill half of the yule log silicone mold with the chocolate mousse and gently tap it against the work surface to remove any air bubbles.
3 - Carefully place in the frozen whipped milk chocolate ganache, gently pushing it into the dark chocolate mousse. Then, pour in another layer of the chocolate mousse to conceal the frozen core. Tap the mold again to remove any further air bubbles.
4 - With the praline facing down, add the dacquoise biscuits on top of the chocolate mousse, gently pushing them down in the mousse. Use an offset spatula to evenly spread the mousse and conceal the biscuit.
5 - Finally, with the yule log assembled, allow it to freeze overnight.
Chocolate Mirror Glaze
1 - Mix the gelatin into the water and set it aside to let it bloom.
2 - In a large saucepan (or like us a saucier pan), add the stevia, heavy cream, and water. Stir together using a silicone spatula and gently bring to a boil for 1 minute. Then, remove from the heat.
Tip: All-Clad is the gold standard for professional quality stainless steel cookware.
For more recommended bakeware and cookware, check out our article: "The Best Non-Toxic Pots & Pans: Our Must-Have Cookware List".
3 - Microwave the gelatin for 10 seconds before adding it to the cream mixture.
4 - Finally, add in the cocoa powder and fully combine with a silicone whisk.
5 - Transfer the glaze through a sieve into a large bowl, to remove any lumps.
Tip: We store our ingredients in these mixing bowls from Duralex while cooking. We love Duralex for their quality products and low prices!
6 - Place a sheet of plastic wrap over the glaze, making sure it is in contact with it so that you avoid a skin being formed. Then, refrigerate overnight.
The next day...
Chocolate Plumes
1 - Finely chop 1.7 oz (50g) of the dark chocolate and set aside.
2 - Take the rest of the dark chocolate and microwave it in 30-second intervals until it reaches 131℉ (55℃).
3 - Add the chopped chocolate into the melted chocolate and stir together. Mix until the temperature reaches 86℉ (30℃).
4 - Carefully dip the tip of a pairing knife into the chocolate, scraping off just one side. Then, gently press the chocolate-coated side of the blade onto a sheet of acetate to create a leaf shape. Repeat to create as many leaves as you can before the chocolate sets. Transfer the sheets of acetate to the inside of a baguette pan to allow the chocolate leaves to set in a curved shape. Leave to set at room temperature.
5 - Once set, gently brush the chocolate plumes with gold powder. Then, gently peel them off the acetate.
6 - Dip the tip of a knife in hot water and use it to make small notches into the sides of each plume.
Decorating the Yule Log
1 - Unmold the frozen yule log and turn it the right way up onto a cooling rack before placing it back into the freezer.
2 - Take the set mirror glaze and heat it in the microwave until it reaches 89℉ (32℃). Then, transfer to a jug.
3 - Keep the yule log on the cooling rack and place it on a baking tray. Then, carefully pour the mirror glaze over the entire yule log, making sure it is fully and evenly coated in glaze.
4 - Allow any excess glaze to drip off before carefully transferring the yule log to a serving dish using a flat metal spatula.
5 - Finally, decorate the yule log with chocolate plumes by gently pressing them into the mirror glaze.
6 - Place the yule log into the refrigerator for about 2 hours before tasting.
7 - Enjoy!
Watch our video for more details!
- - - - - - - - - - - - - - - - - - - - - - - - - - -
Disclaimer: baking/cooking times vary according to each appliance. Make sure to always control halfway through for success.
- - - - - - - - - - - - - - - - - - - - - - - - - - -
🎬 Everything we used for this recipe:
🍶 Kitchenware: Coming soon!
🍳 Ingredients: Coming soon!
- - - - - - - - - - - - - - - - - - - - - - - - - - -
Enjoy our content? Support us! 💖
The information provided in this recipe is not nutritional or medical advice. Please read our disclaimer.