


Mont Blanc: Chestnut Tart Recipe
This post may contain affiliate links. Please read our disclosure policy.
The genesis of this dessert gives rise to a lot of mysteries! According to some versions, this tasty chestnut dessert was discovered in Italy at the end of the 15th century before arriving in France around the 1620s. For others, the Mont-Blanc dessert would have been invented in the kitchen of Angelina’s pastry shop in Paris during the 20th century.
During winter, Mont Blanc desserts are very popular in many French pastry shops. Today, we would like to share with you our recipe for the most delicious Mont Blanc dessert. This pastry will make an excellent dessert for Christmas and will bring an elegant touch to the table. You can definitely make this recipe both as a large dessert or like us as individual tarts.
We truly can’t wait for you and your family to try this chestnut tart recipe!
Bon appétit!
Difficulty: ![]()
![]()
![]()
Prep time: 60 mins / Cook time: 40 mins / Servings: 4 tarts
- - - - - - - - - - - - - - - - - - - - - - - - - - -
Chestnut Cream
1 tsp (3g) - Gelatin powder
1½ tbsp (18g) - Water
7.5 oz (215g) - Heavy cream
4 - Egg yolks
1.3 oz (37g) - Xylitol
12 oz (340g) - Mascarpone
10.5 oz (300g) - Chestnut spread
Sablé Breton
3 - Egg yolks
3 oz (90g) - Butter
¼ cup (60g) - Xylitol
1 tsp (3g) - Sea salt flakes
¾ tsp (2.5g) - Baking powder
1⅓ cup (180g) - Flour
Chestnut Almond Cream
1¾ oz (50g) - Butter
1¾ oz (50g) - Xylitol
1¾ oz (50g) - Almond flour
1 - Egg
0.8 oz (25g) - Chestnut spread
Assembling the Mont Blanc
Tarts
Frozen chestnut cream
10.5 oz (300g) - Chestnut cream
5.3 oz (150g) - Chestnut spread
5.3 oz (150g) - Heavy cream
- - - - - - - - - - - - - - - - - - - - - - - - - - -
We advise that you prepare all the above ingredients before starting.
You will typically need: a scale, measuring cups, mixing bowls.
Chestnut Cream
1 - Start by separating the eggs, placing the 4 egg yolks in a large bowl. You can save the egg whites in the fridge for another recipe.
Tip: We store our ingredients in these mixing bowls from Duralex while cooking. We love Duralex for their quality products and low prices!
2 - Add the xylitol to the egg yolks. Then, whisk until the mix is smooth and set aside.
3 - Add the water to a small bowl and sprinkle over the gelatin powder. Using a skewer (or something similar), stir the gelatin into the water making sure it is fully immersed. Set aside to allow the gelatin to soften and bloom.
4 - Pour the heavy cream into a saucepan (or like us a saucier pan) and bring it to a boil over a medium heat. Once boiling, remove it from the heat and gently pour over the egg mixture while continually whisking. Keep whisking until the cream is fully combined.
Tip: All-Clad is the gold standard for professional quality stainless steel cookware.
5 - Pour the egg cream mixture back into the saucepan and place over a medium heat. Stirring continuously with a spatula (wooden/silicone), allow the mixture to cook until the temperature reaches 185℉ (85°C), then remove the pan from the heat.
Tip: We recommend using a good kitchen thermometer for accuracy.
6 - Add the mascarpone to a mixing bowl. Then, add the hot cream mixture to the bowl straining it through a metal sieve. This ensures that any lumps are removed and the cream remains smooth.
7 - Then, using a hand blender, blend the mascarpone and the cream together until silky smooth.
Tip: Our must-have hand blender is the Braun Multiquick Technology.
8 - Take the resting gelatin mix and microwave it for 10 seconds before adding it to your cream. Use a silicone spatula to fully combine the gelatin into the cream.
9 - Finally, add in the chestnut spread and blend to fully combine it and to make the cream completely smooth.
10 - Transfer the cream into a pouring jug. Then, carefully pour the chestnut cream into 4 small dome silicone molds; completely fill each dome to the top. Transfer to the freezer and allow to freeze for at least 2 hours. Return the extra chestnut cream to the fridge to be used later when assembling the tarts.
11 - Once completely frozen, unmold each frozen dome from the silicone mold. Place the molds on a plate and return them to the freezer while you make the other components of the tart.
Sablé Breton
1 - In a large mixing bowl, whisk together the flour, baking powder and salt.
2 - Separate the 3 eggs, placing the egg yolks into a medium-size mixing bowl. Again, you can keep the egg whites in the fridge for another recipe.
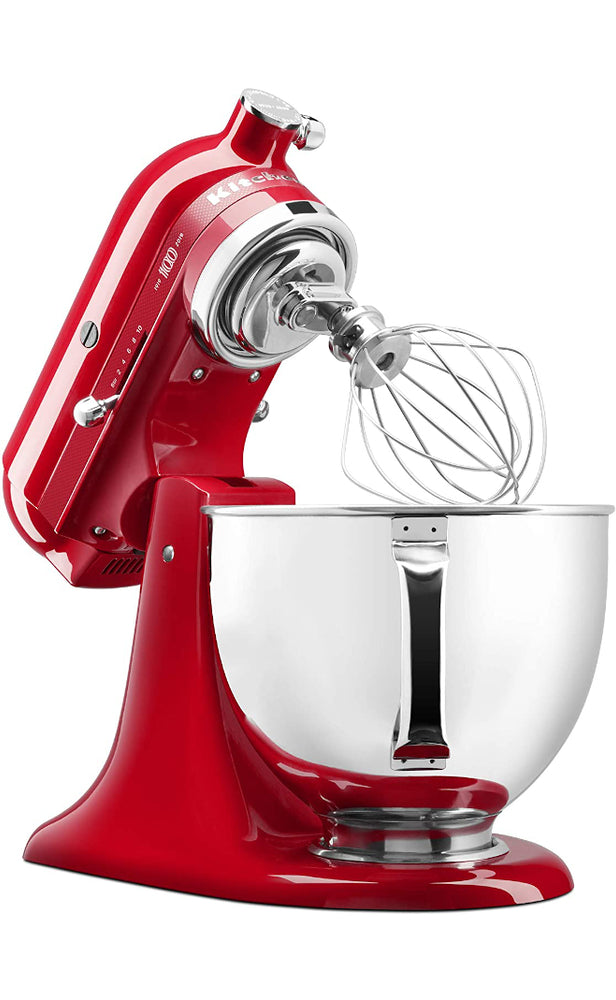
3 - To a stand mixer bowl, add the xylitol and the butter. Using the beater attachment, beat together on a medium speed until light and fluffy. With the motor still running, add in the egg yolks and allow them to be fully combined before turning off the mixer.
Tip: The KitchenAid Artisan Design Series and the KitchenAid Professional 600 Series are superstars among stand mixers and will look amazing in your kitchen!
For more information, check out our detailed article "The Best KitchenAid Mixers & Blenders".
4 - Add in the flour mix and beat it into the mix on a low speed. Allow to mix until just combined.
Tip: The dough should be a little crumbly but hold together when pressing it.
5 - Place the dough onto a sheet of plastic wrap and fold the plastic over the dough to fully seal.
6 - Then, using a rolling pin, gently roll the wrapped dough into a square about ½ inch thick. Transfer the wrapped dough to the fridge and allow to rest for 20 minutes.
Tip: This process will allow the dough to set faster and will help you roll it out later.
7 - Unwrap the chilled dough and place it between 2 large sheets of parchment paper.
Tip: Adding flour to some types of dough results in a crumbly texture. Rolling between 2 sheets of parchment paper prevents this from happening.
8 - Roll out the dough to a very thin sheet. Remove the top layer of parchment paper and use a 2 ¼ inch tart ring to cut out 4 circles for the bases of your pastry cases.
Tip: Here, we are using the De Buyer perforated tart rings.
9 - Next, using a sharp knife, cut 4 strips (roughly 1 inch thick and 7 inches in length) out of the rest of the pastry that will be used to create the sides of the pastry cases. Re-cover the pastry with the parchment paper and place in the fridge to chill for 10 minutes.
Tip: We recommend you use a chef's knife for this task. We love Japanese knives and recommend this quality kit from GLOBAL for home and professional chefs. We also love this reversible cutting board with integrated hand grips from John Boos.
10 - Using a flat metal spatula, carefully lift and place each cut disc into the bottom of individual perforated tart rings.
11 - Next, take the pastry strips and place them on top of the base and around the inside of each tart ring to create the sides. Gently press the pastry strips to the tart ring, making sure the ends of the strip are also pressed together and that it is in contact with the base piece all the way around.
12 - Using a sharp knife, carefully trim off any excess dough that is protruding over the top of each pastry ring. Then, using a fork, gently prick the entire base of each tart case to prevent the pastry from puffing up in the oven. Transfer the pastry cases to the fridge to chill for 1 hour before being baked.
13 - Preheat the oven to 340℉ (170°C) and transfer the chilled tart cases onto a baking tray lined with parchment paper (or a silicone mat) to go into the oven to bake for 20 minutes. While baking, prepare the egg wash by whisking together 1 egg yolk with ½ tbsp of heavy cream.
14 - After 20 minutes of baking, remove the tart cases from the oven and allow to cool slightly so that the rings can be removed.
15 - To tidy up the shape of each tart case, use a microplane to gently grate off and remove any bumps or irregularities. Then, with a pastry brush (boar/silicone), brush the entire inside and outside of the pastry cases with a thin layer of the egg wash.
16 - Finally, return the cases to the oven to bake for another 5 minutes. Once baked, remove from the oven and allow to cool completely before filling.
Chestnut Almond Cream
1 - To a large mixing bowl, add the butter and soften it by placing it in the microwave for 15 seconds. Use a silicone whisk to beat the butter to a fluffy texture before whisking in the xylitol.
2 - Crack in 1 whole egg and beat with the whisk to fully incorporate.
3 - Add the almond flour and finally the chestnut spread. Then, give it a final mix.
4 - Transfer the cream to a sealable food container and refrigerate for 30 minutes.
5 - Transfer the chilled cream to a piping bag with a round nozzle. Pipe a neat spiral of cream to the bottom of each cooled tart case so that each case is about ¾ filled.
6 - With the oven still at 340℉ (170°C), place the tart cases on a silicone mat lining a baking tray and bake for 20 minutes. Once baked, remove from the oven and allow to cool completely before assembling the tarts.
Assembling the Mont Blanc
1 - Add the heavy cream to a large bowl and, using an electric whisk, whip until it forms soft peaks. Transfer the whipped cream to a piping bag with a large round nozzle.
Tip: We recommend this 7-speed hand mixer from KitchenAid for its quality and elegant design.
2 - Place the frozen chestnut cream domes on a parchment paper lined plate or tray. Then starting at the base, carefully pipe the whipped cream around each chestnut dome to form tall spiral cones that represent a mountain. Once all the domes are covered in cream, transfer them back to the freezer and allow to freeze for 30 minutes.
3 - Take the leftover chestnut cream and add it to a large bowl with the additional chestnut spread. Mix well with a silicone spatula to fully combine. The extra chestnut spread will loosen the cream slightly so return it to the fridge to chill for 30 minutes before using.
4 - Once the cream mountains have solidified in the freezer, use a flat metal spatula to transfer each mountain onto the top of each filled tart case.
5 - Transfer the chilled chestnut cream into a piping bag fitted with a traditional Mont Blanc piping nozzle. Then, pipe the chestnut cream around each frozen cream mountain in a spiral to fully cover each mountain with the spaghetti-shaped chestnut cream.
6 - For a final decoration, dust over some powdered monkfruit sweetener to resemble the snow on the mountain.
7 - Enjoy!
Watch our video for more details!
- - - - - - - - - - - - - - - - - - - - - - - - - - -
Disclaimer: baking/cooking times vary according to each appliance. Make sure to always control halfway through for success.
- - - - - - - - - - - - - - - - - - - - - - - - - - -
🎬 Everything we used for this recipe:
🍶 Kitchenware: Coming soon!
🍳 Ingredients: Coming soon!
- - - - - - - - - - - - - - - - - - - - - - - - - - -
Enjoy our content? Support us! 💖
The information provided in this recipe is not nutritional or medical advice. Please read our disclaimer.